Ring in the New Year with a Supermoon and JPL!

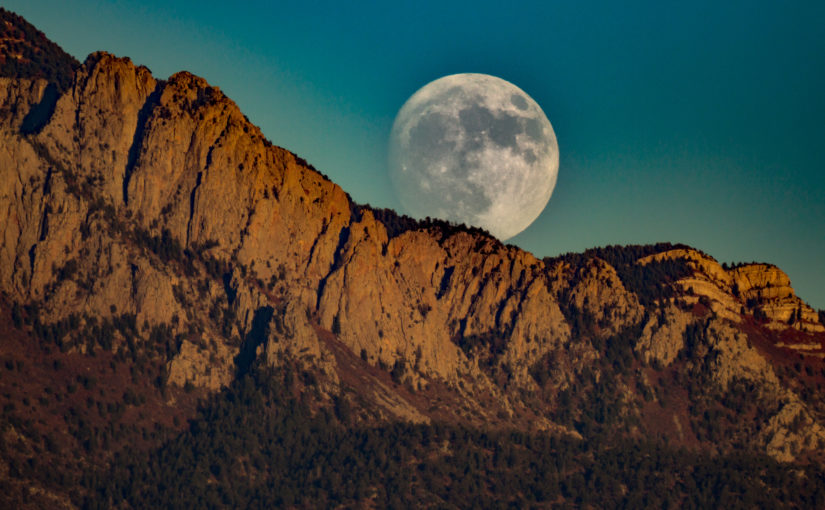
Tonight as you countdown to midnight, ring in the new year with 2018 ‘s first supermoon! January 1st at 7:15pm (MDT) happens to be the first full moon of the year.  It will also be near perigee (it’s closest distance to Earth) making it a supermoon.  But the Moon will still be an amazing site tonight as we all celebrate!  It will rise a little before sunset (~4:10pm MDT) and be visible until before sunrise (~5:30am MDT) providing all new year’s revelers a wonderful midnight glow. And because the Moon will be close to perigee, it will appear bigger and provide extra light – the perfect New Years ball!

January will see another supermoon at the end of the month as well. This is an extra special supermoon since it is a blue moon (second full moon in a month) and the night of a total lunar eclipse. Here in Albuquerque we will be treated to an early morning total lunar eclipse show on January 31st as a blood red Moon sets at ~7:00am MDT.  The partial phase of the lunar eclipse begins at 4:48am MDT, with the Moon completely eclipsed beginning at 5:51am MDT.  We will not see the second phase of the partial lunar eclipse as the Moon slips out of the Earth’s shadow.  But, it will be an amazing site seeing the light of the sun rises from Earth turning the Moon red as it sets near the volcanoes to the west of ABQ.

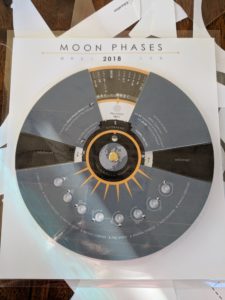
With so many Moon events occuring in 2018, my family decided to make a Moon phase calendar for the year. JPL just released an excellent template for making a Moon phase calendar that spins. 

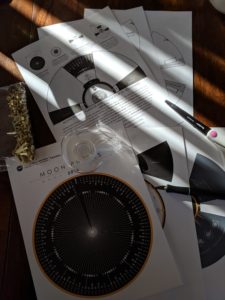
We had a great time making ours while discussing the phases of the Moon and eclipses. We’ve had even more fun using them since – both of my kids have been looking forward to what phase the Moon will be on different dates in 2018. My six year old was able to make her calendar primarily by herself; she only needed help with hole punching.

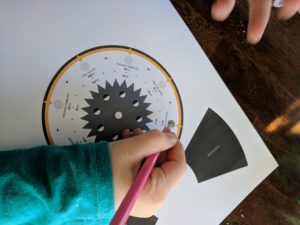
I even made a laminated version to guard against a year’s worth of wear.


Have a wonderful supermoon New Year!!!!

Clear skies.

~Misty Carty, Ph.D.


Discovering the Reasons for the Seasons

Discovering the Reasons for the Seasons – Science Activity

September is a great month to start discussing the seasons! The Fall Equinox is fast approaching and I have a great indoor activity to complement my title, Why Are There Seasons?, to help kids discover why we have seasons. Using a globe and flashlight to simulate the Earth and the Sun, kids can see how the shadows of a figurine change in Winter, Summer, & Spring/Fall – the effects of the seasons!

All you need to do this fun experiment are the following materials:

  1. Globe
  2. Putty
  3. Lego figurine
  4. Flashlight
  5. Stack of books
  6. Flexible tape measure
  7. Optional – piece of white card stock

If you don’t have a globe at home, you can use any ball by marking the tilt of the Earth, which is 23.5 degrees.  Marking the tilt will help kids see physically how the Earth is oriented compared to the Sun for each season.

Set up:


  1. Take a look at the globe, notice that it is tilted.

2. Find the United States, then find your state

  1. Place a bit of putty on the bottom of the figurine and place it standing on top of your location.
  2. Using a stack of books, place the flashlight on top so that it is shining on the middle of the globe.


Main Activity

Winter

  1. Spin the globe so that its tilt points away from the flashlight and the figurine is facing the flashlight. (You may have to position the globe and then spin it to orient the figurine.)
  2. Notice the figurine’s shadow. Is it long or short?


Using the flexible tape measure, find the length of the shadow.  (You can use a piece of card stock to illuminate the shadow better.)


Summer

  1. Place the globe so that its tilt is toward the flashlight. Make sure the figurine is facing the flashlight, too.
  2. Notice the figurine’s shadow. Is it long or short?


Using the flexible tape measure, find the length of the shadow.  How does this measurement compare to that in Winter?


Spring/Fall

  1. Place the globe so that its tilt is perpendicular to the flashlight. The figurine should again be facing the flashlight.
  2. Notice the figurine’s shadow. Using the flexible tape measure, find the length of the shadow.  How does this measurement compare to that in Winter? Summer?


Follow Up

The following are some optional questions to discuss

  1. From your experience, which season is the coldest? Warmest?


  1. From your measurements, which season has the longest shadows? Shortest?


  1. How does the tilt of the globe affect the length of the figurine’s shadows? (Think about how the length of the shadows would change if the globe had no tilt or a more extreme tilt.)


  1. What causes the seasons?


  1. Using your knowledge gained in this exercise, describe how you think shadows of real objects outside will change throughout the year?


I hope your kids have as much fun as mine did playing with the seasons; seeing the change in the figurine’s shadow was very exciting.  If you enjoyed this activity, please check out my book Why Are There Seasons?!

Clear Skies!

~Misty Carty, Ph.D.


Attribution-NonCommercial-NoDerivatives 4.0 International (CC BY-NC-ND 4.0)

Countdown to the Eclipse – Solar Eclipse Name Viewers

Solar Eclipse Name Viewers


***Remember, NEVER look directly at the Sun without proper solar glasses or filters – it will damage your eyes.  Sunglasses do NOT count.***


Countdown: 10days: 23hr:27min

Today, as part of our solar eclipse countdown, I wanted to show you how to make a fun solar eclipse viewer to use during the partial phase of the solar eclipse.  In the picture above and the directions below, I suggest using your name.  But get creative!

Materials Needed:

  1. Cardstock
  2. Pushpin
  3. Pushpin Mat (or cardboard, styrofoam anything so the pushpin does not damage the surface you are working on)
  4. Pencil


Making the Viewer:

Step 1 – Take your piece of cardstock and using your pencil, write your name using large letters.

Step 2 – Place your cardstock on the pushpin mat (I used styrofoam).

Step 3 – Use the pushpin to make holes along the letters you wrote.  Be sure to space your holes at least a half inch apart so the images of the Sun will be easily separated. 

Step 4 – Once you’ve finished making all the holes, hold your cardstock up to a light in the room.  Check to see if all of the holes are cleanly punched.  Go back and fix any holes as needed.


Using the Viewer:

On the day of the eclipse you will take your viewer outside with you.

Step 1 – Stand with your back to the Sun.

Step 2 – Hold your viewer out to your side.

Step 3 – Angle your viewer so that the holes are facing the Sun.

Step 4 – Look at the ground to see the images of the Sun write out your name!


If you’d like to make these viewers and use them in your class or for homeschooling, please feel free!  Here are some follow-up questions you can ask.

Follow up:

What shape are the images your viewer makes?


Try using your viewer in different locations.  Is it easier or harder to see the images of the Sun on a lighter or darker surface? A bumpy or smooth surface?


Try positioning your viewer at different angles.  How do the images change?


Try holding your viewer at different heights from the ground.  What happens to the size of the images?  At what height do they seem the most crisp?


Have Fun!


***Remember, NEVER look directly at the Sun without proper solar glasses or filters – it will damage your eyes.  Sunglasses do NOT count.***


~Misty Carty, Ph.D.